Index of /irradium/images/lichee_pi_4a
Installation
------------------
Flashing the bootloader
------------------
for the firmware you need the program android-tools (prt-get -if -is depinst android-tools)
bootloader to be boot-xxxxxxxx.tar.xz (https://dl.irradium.org/irradium/images/lichee_pi_4a/)
Method 1
WARNING! When using this method, the partition table on eMMC is overwritten
# sudo fastboot flash ram boot-xxxxxxxx/u-boot-with-spl.bin
# sudo fastboot reboot
# sleep 10
# sudo fastboot flash uboot boot-xxxxxxxx/u-boot-with-spl.bin
Method 2
Boot from the image written to the sdcard and execute the commands:
# echo 0 | sudo tee /sys/block/mmcblk0boot0/force_ro
# dd if=/boot/u-boot-with-spl.bin of=/dev/mmcblk0boot0
Flashing the SD card
------------------
Unpack the IMAGE file and copy the image an SD card: (assuming SD card at /dev/mmcblk0):
# zstd -d irradium-*-core-*-build-*.img.zst
# dd if=irradium-*-core-*-build-*.img of=/dev/mmcblk0 bs=1M
or unpack directly to the card
# zstdcat irradium-*-core-*-build-*.img.zst > /dev/mmcblk0
Flashing the eMMC
------------------
To write to eMMC, you must first write the image to the root of the bootable SD card,
boot from the SD card and write using the methods described in "Flashing the SD card" section, eMMC name /dev/mmcblk0
Instalation eMMC/NAND/USB-HDD
------------------
to transfer a system with the SD to eMMC, you need to boot from the start and run the script:
# transfer-to-disk
Default Login
------------------
login: root
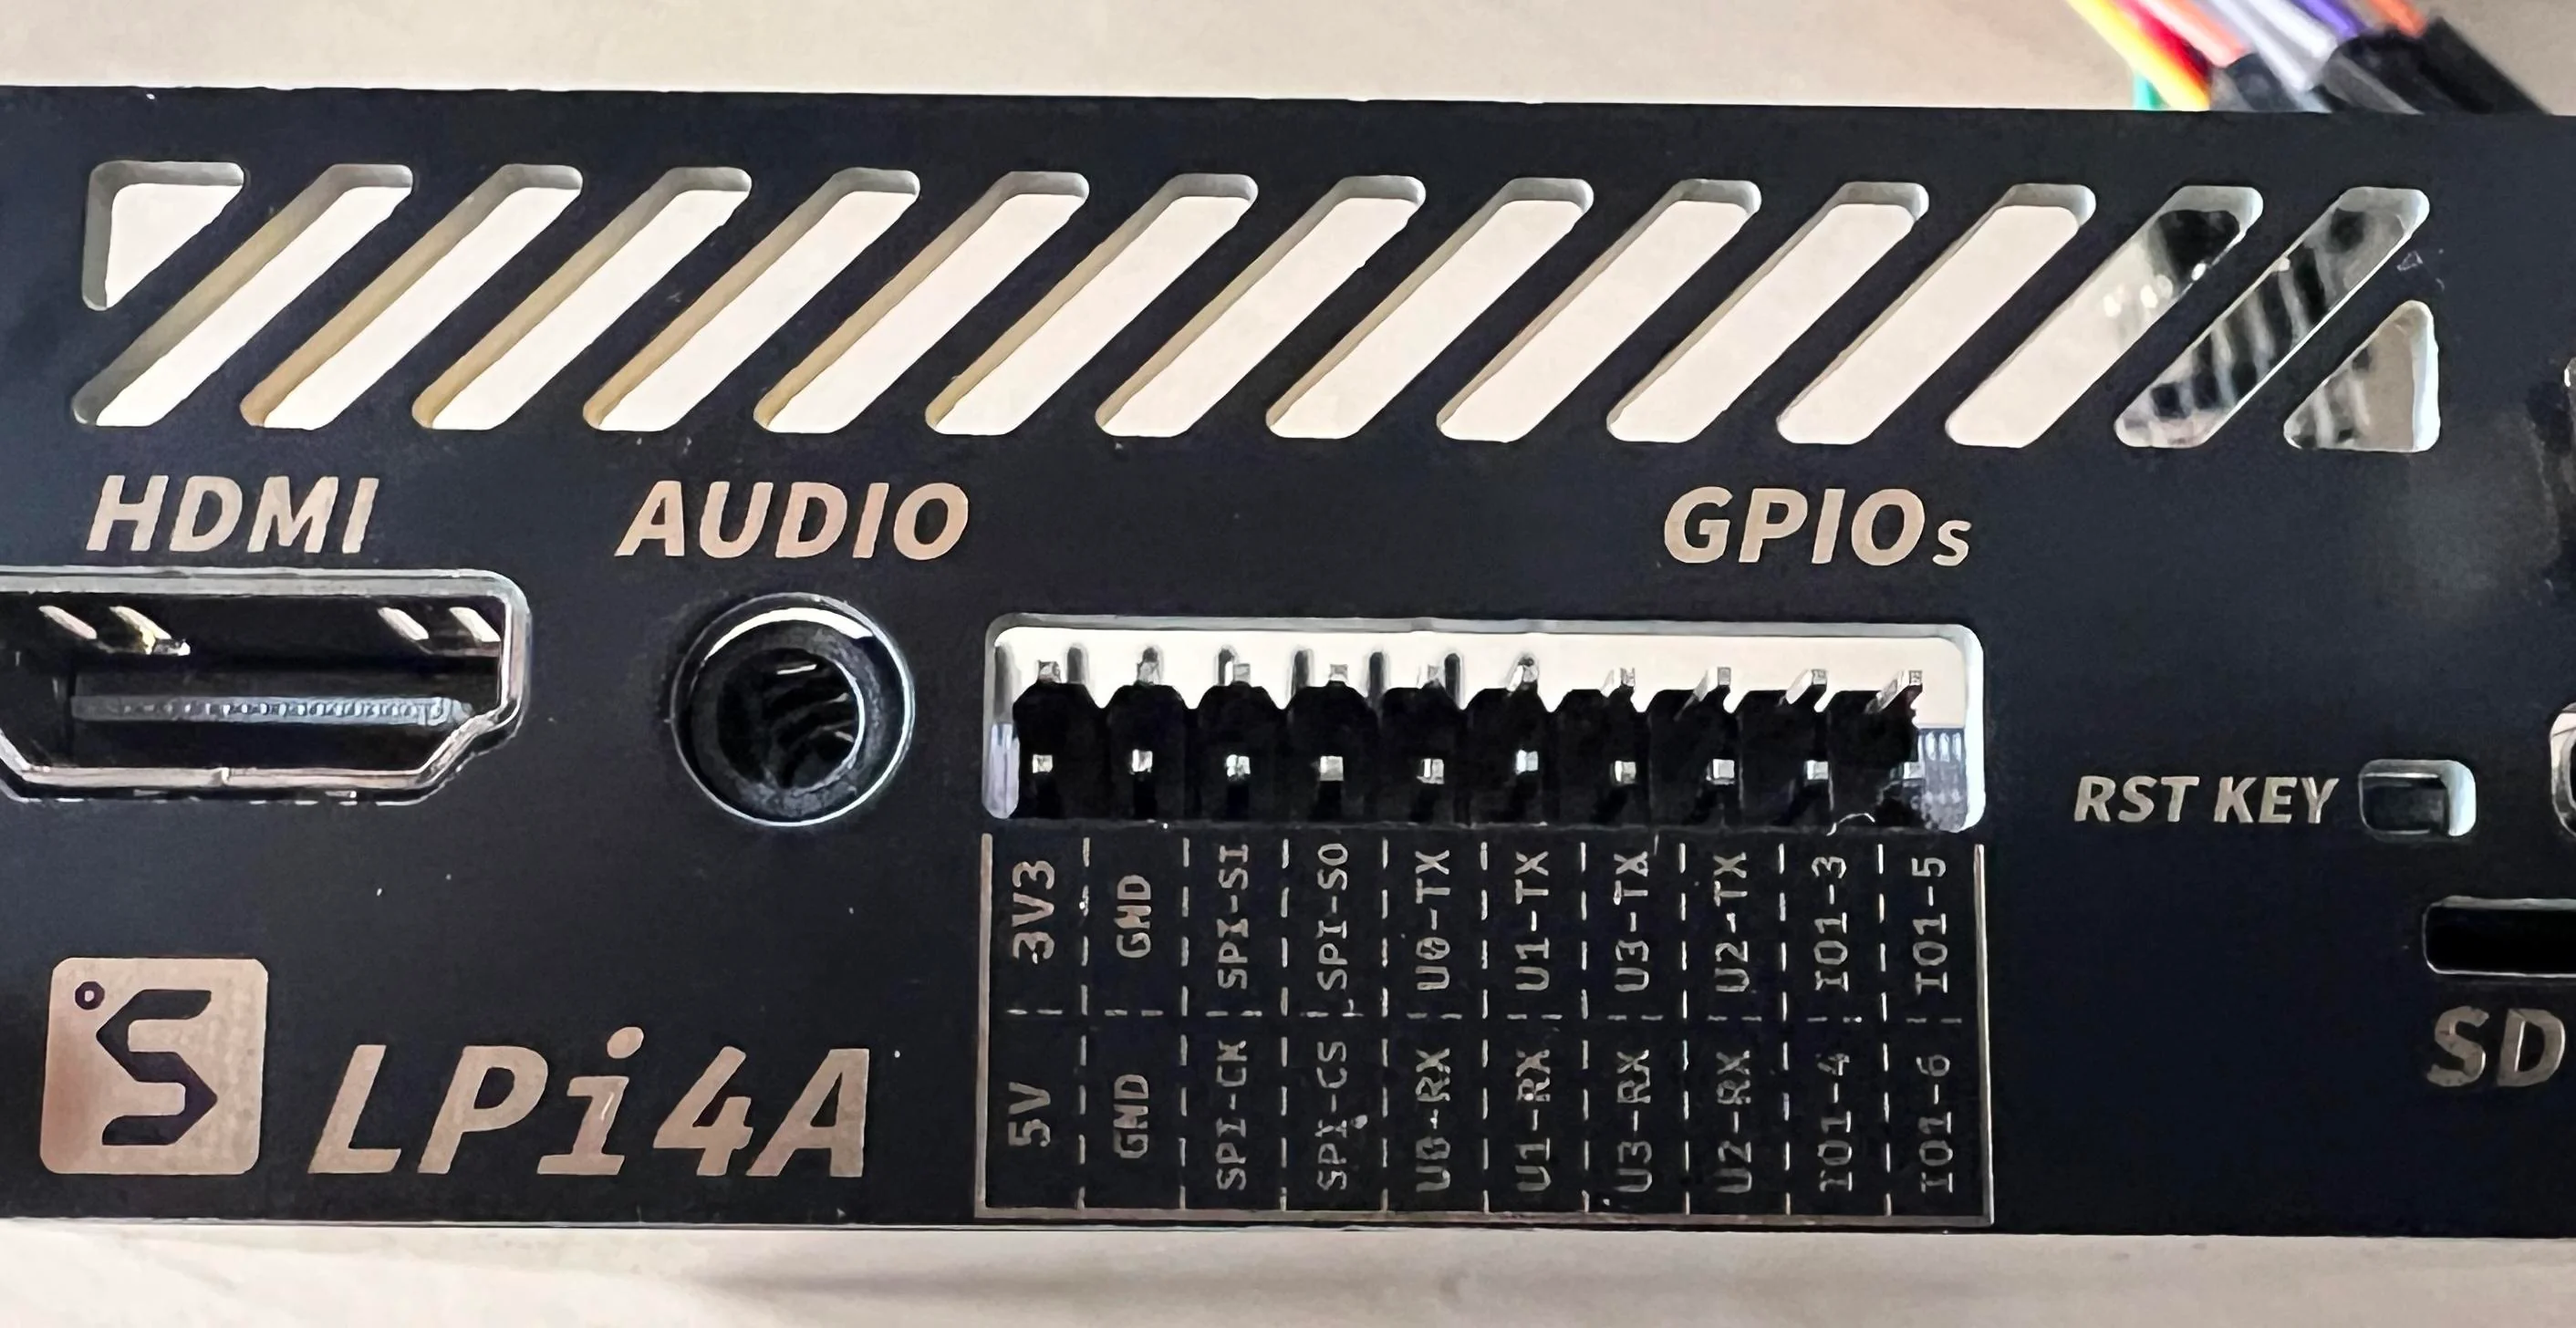
Debug
------------------
Pin 4 is GRD
Pin 9 is TXD (U0-TX)
Pin 10 is RXD (U0-RX)
example: sudo screen /dev/ttyUSB0 115200